The First Environment - Village
- Kelly Clayton
- Jul 29, 2022
- 6 min read

Updated: Aug 11, 2022
There was a lot riding on this environment. Not only does it have the most amount of unique assets, but also sets the tone for the rest of my work. What will the quality be? Can I stick well to this style I am trying? Am I able to do it?
Previously, I have only ever done one exterior environment in Unreal Engine completely from scratch like I am doing here. And it was not good. I hated it because it wasn’t what was in my head and a real chaotic mess, nothing blended. I didn’t understand the tools well and a comment from someone in class when we were learning the engine was getting to me – “haha you don’t even understand lighting, you’ll never amount to anything” – I thought he was right after that environment.
My second unreal environment was an interior and got praised a lot by peers and lecturers. But it didn’t come easy. I started again, learnt it all, watched countless videos and worked stupidly hard to not let myself down again. But then I stopped with unreal, took a break, tried something else for a while until semester 1 of this Masters where I made a megascans environment for a proof of concept. And again, it was praised by peers and friends from undergrad – someone last month brought it up to me again over dinner and said ‘that was some insane work, I thought it was real’.
I was hesitant for a long time about fully committing to using Unreal Engine for this project and properly picking it up again but thanks to peoples unwavering belief in my abilities, it was the right choice.
In truth, I still have no idea what I'm doing - but what I am doing, I’m doing it the best I can.
---
Village - The Development (7A, 7B)
1. Concept Development
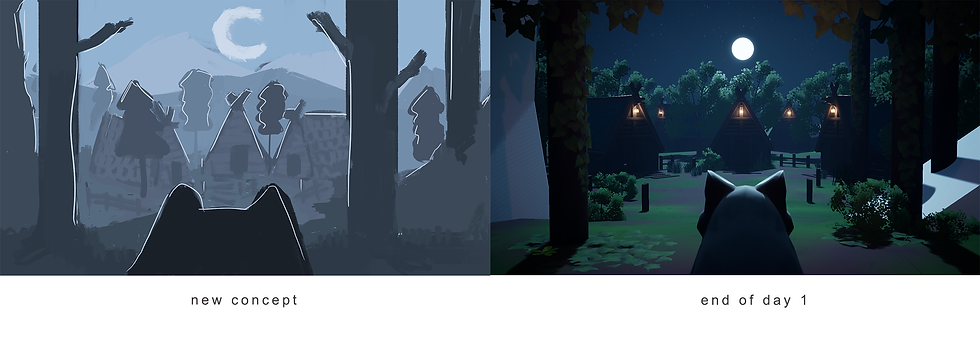
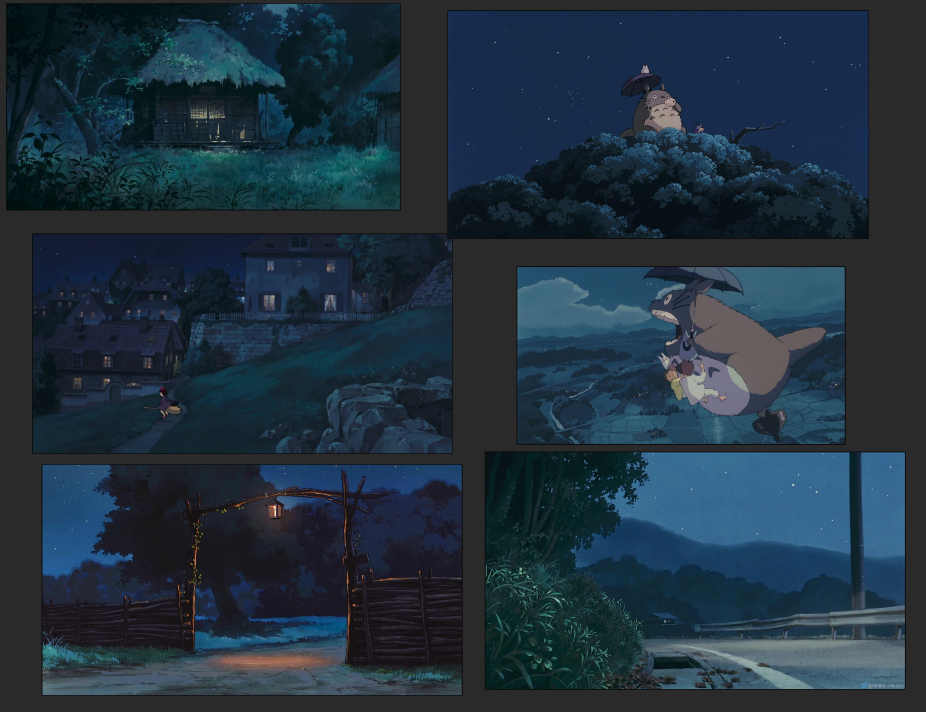
From my animatic I had a cave-like entrance to the scene where the wolf was lurking out of. This was then blocked out in 3D. However, the previous scene in the film talks about how the wolves are in the forest. Although my transition between the scenes made it so that realistically the next scene can be to location, I wanted to include the trees as the entrance to this village scene as recognition of the scene before. They were once deep in the forest and now the wolf made it to the edge of it and is looking for pray.
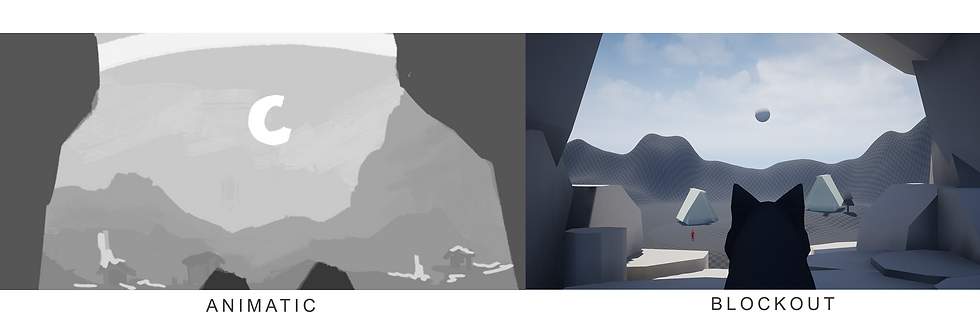
Doing a new sketch helped me figure out composition including the trees.

The whites lines indicate to me where I want the light, the red where I want the shadows.
2. Asset Creation
Trees
I started again with looking at trees, previously I did one in Maya and it was a good practical test but wanted to try it again with pine as that is a common tree in Iceland/Scandinavia. I had to two options on how to do it, either using geometry baked into planes or photoshop. I wanted to try photoshop again for a more customisable style. Once I had the textures, I projected them onto planes and make a rough tree shape in Maya then put it in engine.


I liked the looks of the diffuse texture, but it was painfully obvious that these where planes on cylinder as I didn’t fix the normals.
Next, I turned to TreeIt to make my natural looking trees. Like SpeedTree, it is a realtime 3D tree generator and a really powerful tool. I watched a video by Prismatica and just got to trying it myself because that’s the best way I learn.
Here is my second TreeIt attempt, using that texture I made for photoshop tree 1 attempt -

Ivy
Using Projection Mapping again, I created ivy for the foreground trees.

Simply creating an alpha with 4 leaves and 3 sticks and painting a diffuse with bleed over it for colour. Arranging the leaves with different combinations on the sticks in Maya and keeping one of each leaf on the side to use individually if need be. I painted some colours onto a cylinder for the trunk in painter. It didn’t really matter to me if the colours were blended or not because I was aware that you would barely see it in the dark environment anyways as the asset will sit in the foreground.
The individual leaves in the end were helpful as an in between of the combined – making it more natural.

I used the vertical vines most on the tree and used the one sitting horizontally in Maya for the ground and to frame the image at the top.

Generally, I just figured out the best positions to put the ivy on the trees myself but had this reference open when I was making the asset itself: https://www.artstation.com/artwork/wJb1BX
Ground Material
For the ground material, I created 5 different coloured texture maps in Photoshop with a little bit of darker colour on each for variation. I made sure that around the edge of the map it was a solid colour so that it looked less buggy when it was automatically tiled on the landscape in UE. I hooked them up to a landscape layer blend node and painted directly on my landscape. I only used 3 out of 5 textures for this environment.

Lantern
Because the scene will be lit mostly by the moon itself the scene colours will dominantly be blue. However, I wanted to bring in some warmer colours to indicate that people live in this village. For this to happen I need to make some practical lights – lanterns.
In engine I was playing with how I want to fire texture inside to be lit in the scene. Checking on how much emissive I can use without destroying the colours in the texture map.

Fire Texture Map

Just having point lights outside the box kept a good gradation from yellow to the orange, whereas the lights and the emissive together gave me a really nice stronger glow. Because the lanterns would be in the distance of this, I kept the emissive x lights combination for the glow.
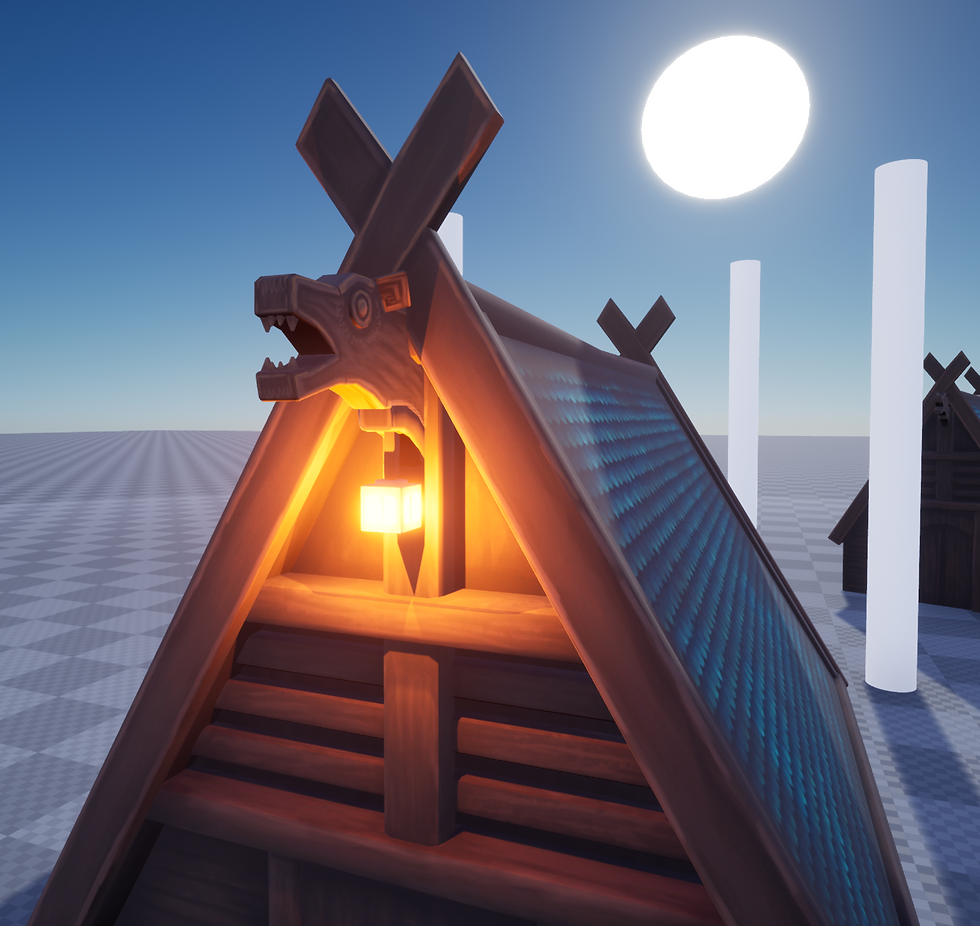
Asset in engine
Fences
I made some fences for additional assets to help direct attention and focus to the moon. These assets also split up the foreground, middle ground, and background.

Within these assets, I also made a plank for a floor path and a longer wooden pole that was originally going to be for fire or the lanterns but then I didn’t. I purposely designed the fence post on the left to have a slant so that I can point it at important things.

Fences in engine
3. Staging and Lighting
As with any environment, it takes time and iterations to get right and there’s an ugly stage. At the end of day 1, I was there, at the ugly stage. Though the main night lighting was set up, the composition was off, it didn’t have all the foliage or rocks, it just felt wrong, and I was upset. I sadly doubted myself again if I was actually able to do this.
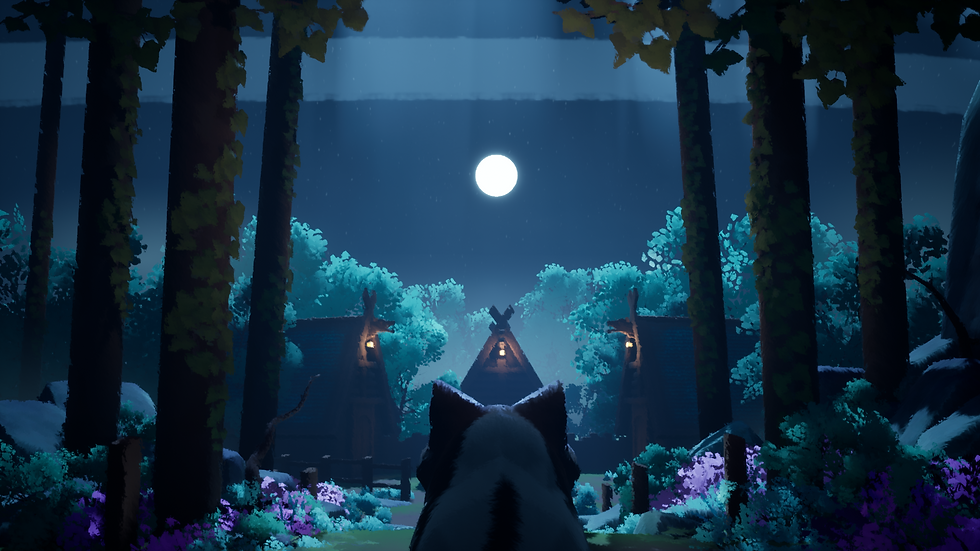
Day 2 came around and I powered on. Changed the camera to point up to the sky so that there is more space in the sky also for the 2 other shots that take place in this scene. Started to build out the foliage and colours and it came together. Directing the shadows also helped in the foreground using planes with my alpha tree leaf map on and an upside-down tree.

Here is a breakdown of my environment choices from day 1 and 2:
(sometimes you need to refresh the page if this video doesn't want to play)
Also, at the end of day 2 I tried on the painterly world post process volume shader that I played around with previously here for water look development. Though turned down to a low value it gave the scene more of a stylised, painted feel that I liked by adding a bit of noise to the edges of objects.

The shader value can be pushed further if I map it to specific objects.
Current look of environment -

---
Scene changes from feedback:
Boost lighting on the foreground trees to see the ivy more
Change lantern colour back to warm so it looks more lived in
Change light colour on dog head to more purple
Move mountains right so that the mountain frames the moon like the dog ears
Add more light on houses to show off the texture more (trees also hide the lovely silhouette too much)
Add fog for depth
Add purple/white flowers
Fix tree rim lights
Try Volumetric Clouds (update engine to 4.27.2 from 4.23.3)
Current look of environment -

I ended up taking out the mountains completely to clear up the sky for the Heavens.
---
Added in the Heavens using another Instance of the one in Midgard.
---
Completed wolf asset could be added to the scene.

And added SimpleGrassWind Node to relevant foliage:
5. Lighting References


Comments